Your newly installed wooden fence can benefit from a single inexpensive addition: stain. Applying wood stain to the slats will improve it’s appearance and prolongs the lifespan of your outdoor structure. If you have a new wood fence, you may feel as though it’s not quite complete until it’s been stained or painted.
How long should you wait before painting a new fence
New fences should not be stained right away. The type of wood used in your new fence will influence when, approximately, you should stain it. Wet wood won’t allow the stain to properly penetrate the wood grain and protect the wood.
Pressure treated pine fence posts need to dry before applying a finish. If the fence is made with pressure treated material, you may need to wait 3-4 months for the posts to dry enough.
If you wait too long to paint a dry fence, it may weather too much. A good rule of thumb is to wait a month or two if the fence is made with dry materials, like a cedar wood fence. This will allow it to weather enough but not too much.
You know you’ve waited too long if the wood becomes weathered and gray. Fortunately, it can be sanded or power washed to prepare it for a finish again.
How to stain a fence
For long-lasting, professional-quality results, work with a semitransparent oil-based stain designed for the exterior. These stains elegantly subtly tint the wood to accentuate the natural patina of the underlying material and the formulas have an added bonus of slowing the growth of mildew and rot as well as protect the wood from ultraviolet light exposure.
With basic cleaning supplies, you can refresh your wooden privacy wall in as little time as a weekend—and reap these benefits right away.
Good Timing is Important – Choosing the Best Day
Before staining a wood fence, scan the weekly weather forecast and select a day with temperatures between 50 and 80 degrees, low to moderate humidity, and no precipitation expected for the next 24 hours. If you’re discouraged by the prospects, remember that “good things come to those who wait”. Extreme cold or moisture can prolong the drying time of wood stain, while the opposite extreme can dry out stain too quickly and leave behind unwanted lap marks on the fence.
Prepare the wood fence for painting
Depending on the current condition of your fence, you may need to strip or sand the surface.
If your fence was previously stained or finished, apply wood stain or finish stripper to the slats according to the manufacturer’s instructions, then scrub the slats with a stiff-bristle brush to loosen the old varnish and slough off upright wood fibers.
When applying stain to a new fence, adequate penetration with the water test: Lightly spray a small section of the fence with a garden hose. If water beads form on the slats, lightly sand the slats in the direction of the wood grain. Water successfully penetrating the slats, though, indicates that your wooden fence can readily absorb the stain.
Start with a Clean and Dry Fence
Clean the fence with water from a high-pressure spray nozzle attached to a garden hose (or use a power washer). This will remove light to moderate dirt accumulations and complete the job of the wood stain stripper in blasting away any old varnish from the fence, if applicable. If using a power washer, opt for a low-powered unit operating at no more than 2,000 psi so as not to weather the wood slats. Make sure to let the wood dry out completely before continuing.
Treat spots of mold or mildew with a diluted bleach solution. You can use a rag and rubber gloves or a garden sprayer. Allowing it to settle into the slats for a few minutes before rinsing the fence clean with a high-pressure spray nozzle or power washer. Let the wood dry out completely before moving on to the next step.
Apply stain to the fence slats using a brush, roller, or sprayer
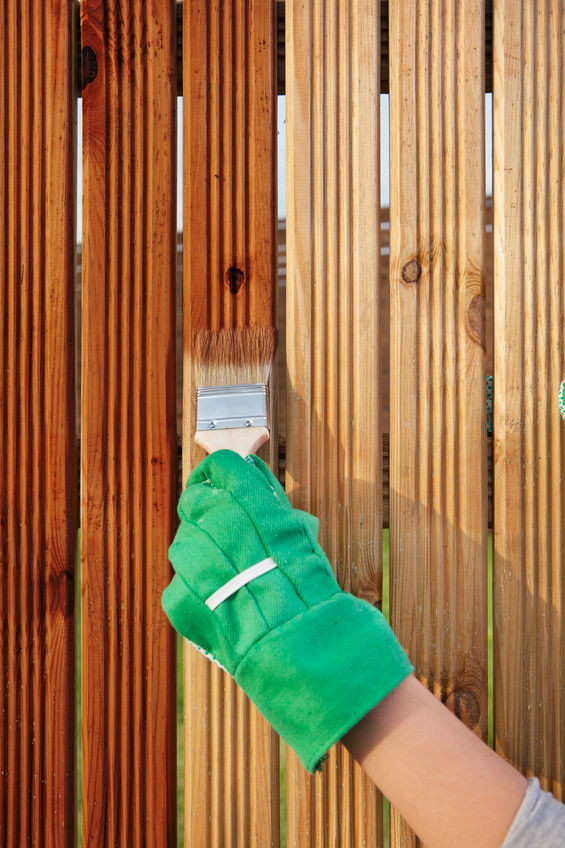
A natural-bristle brush is the best way to encourage oil-based wood stain to permeate wooden fence slats. Dip the tip of the brush into a can of stain, then coat any horizontal slats of the fence from left to right. Afterwards, work your way from top to bottom down the entire length of each vertical slat, maintaining a wet tip at all times. Stain one to two slats at a time to prevent lap marks from forming. One you reach the bottom of a slat, stain the end grain.
Choose a medium nap roller cover, if you’d rather use that to paint with. Fully saturate the roller with the stain and apply in arm length sections of the fence at a time. Use the same approach with a sprayer as a roller, but stand back a comfortable distance from the fence to apply color.
Once dry, apply additional coats if needed
When the wood fence is completely stained, let it dry according to the stain manufacturer’s instructions. Apply additional coats of stain as needed to achieve the desired depth of color. A single coat should be sufficient for a new wood fence or one that you also plan to seal.
Apply a coat of sealer to finish the job
While a good quality stain alone is sufficient to protect your fence from everyday wear-and-tear, applying a durable sealant over the stain can prolong the finish—and the life of your fence. For best results, apply a single coat of clear, weatherproof sealant by brush, roller, or sprayer. Quickly back-brush unsealed grooves and recesses with a wide brush to achieve a uniform appearance. Allow the sealant to dry completely.
A wood fence should be treated every two to three years with stain due to its durability on wood exposed to the elements. Plan to stain your fence every two to three years to preserve its sheen and weather-protective qualities and keep in mind that extreme temperatures and precipitation can prematurely age the finish.